It is the sound of nightmares: that sickening snap. You look down at the damage and wonder if you can fix a broken nail or if you have to cut them all off. Stop. Put the clippers down. We are going to show you exactly how to fix a broken nail so it is invisible.
Stop. Put the clippers down.
Unless the nail is bleeding or hanging by a thread, it is salvageable. You do not have to sacrifice your entire manicure for one casualty. With the right techniques, you can perform “Nail Surgery” at home that is so invisible, no one (not even your nail tech) will know it happened.
In this emergency guide, we are teaching you the legendary “Tea Bag Method” and the pro-level “Silk Wrap” technique to patch the break, reinforce the structure, and keep your length intact.
Step 0: Triage (Assess the Damage)
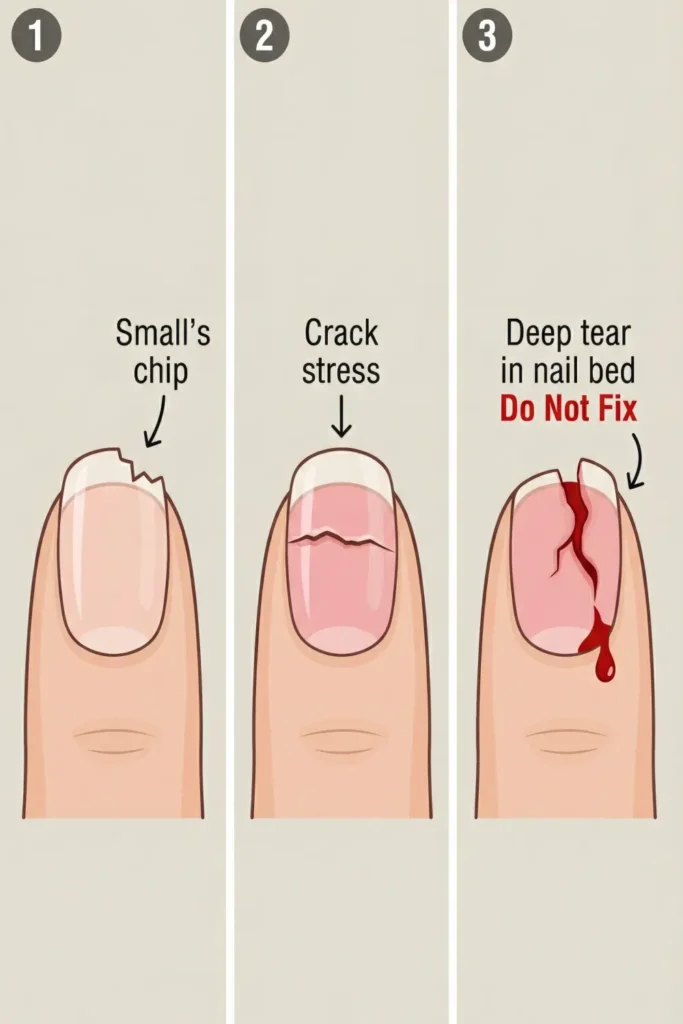
Before you grab the glue, you need to assess the severity of the break. Not all breaks are created equal.
1. The “Snag” (Level 1) A small tear on the side of the free edge.
- Prognosis: easily fixable with a simple file and a patch.
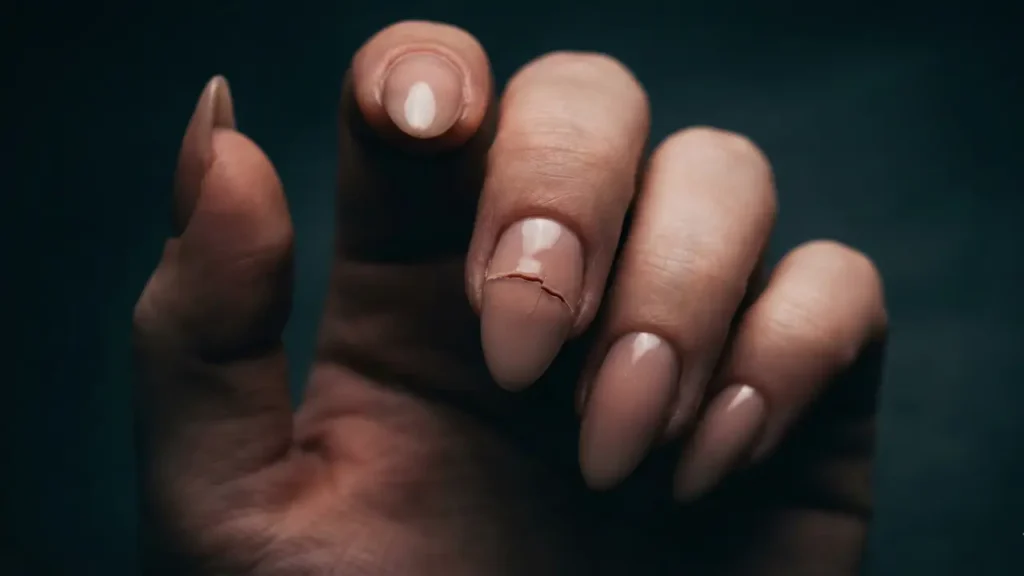
2. The “Meat Break” (Level 2) The break is low down, crossing into the “pink” part of the nail bed. It is painful but not bleeding.
- Prognosis: Fixable, but requires heavy-duty patching (The Tea Bag Method).
3. The “Bleeder” (Level 3) The nail has ripped through the skin, and there is blood or clear fluid oozing.
- Prognosis: Do NOT glue this. Putting nail glue (cyanoacrylate) into an open wound can cause a serious chemical burn or infection. You must cut this nail short, bandage it, and let it heal. Vanity is not worth an infection.
Method 1: The “Tea Bag” Way to Fix a Broken Nail
This is the most famous hack in the nail world because it actually works. The fibrous material of a tea bag acts like rebar in concrete, holding the nail together under the glue.
What You Need:
- A tea bag (unused, paper style).
- Nail Glue (brush-on is best).
- Tweezers.
- A buffer block.
- Top coat.
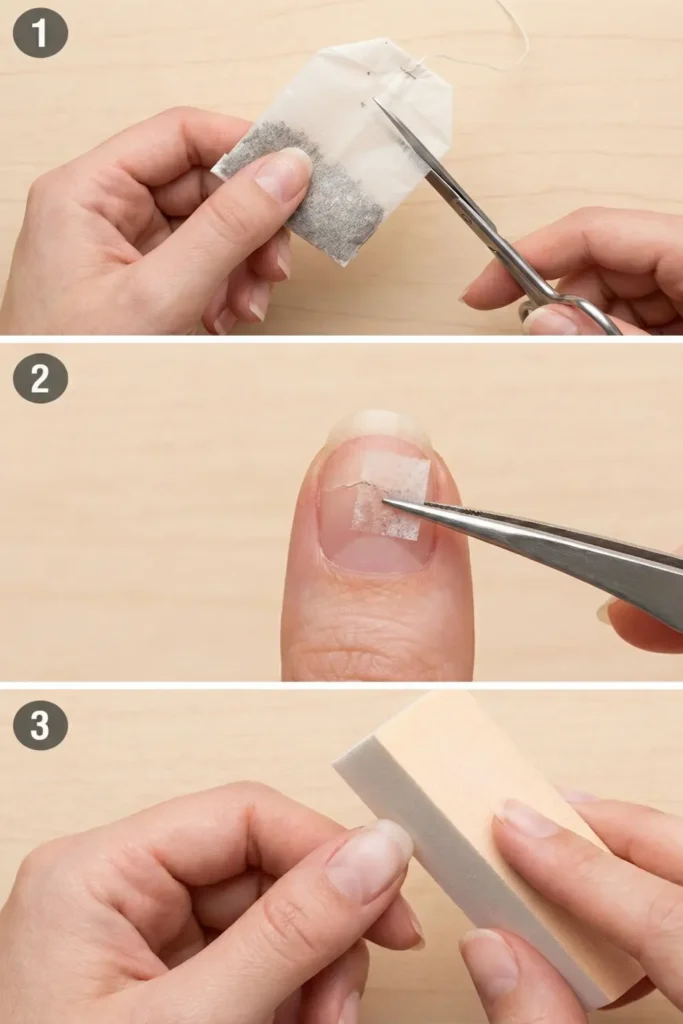
The Step-by-Step:
- Clean Up: Remove any polish from the nail. Gently buff the surface around the break to remove ridges.
- The Material: Cut a small rectangle of the tea bag paper. It should be large enough to cover the crack and about 2mm of the surrounding area.
- The Base: Apply a dot of nail glue directly over the crack.
- The Patch: Using tweezers, place the tea bag rectangle over the wet glue. Press it down gently so it saturates. It will turn transparent.
- The Seal: Apply another layer of glue over the tea bag. Let it dry completely (it will look rough).
- The Blend: Take your buffer and gently sand down the edges of the dried glue/tea bag until it is flush with your natural nail. If you can still feel a bump, buff more.
- Finish: Apply your base coat and color. The break will be invisible.
Why We Love It: Most people have these items in their kitchen right now. It is the perfect 2 AM emergency fix.
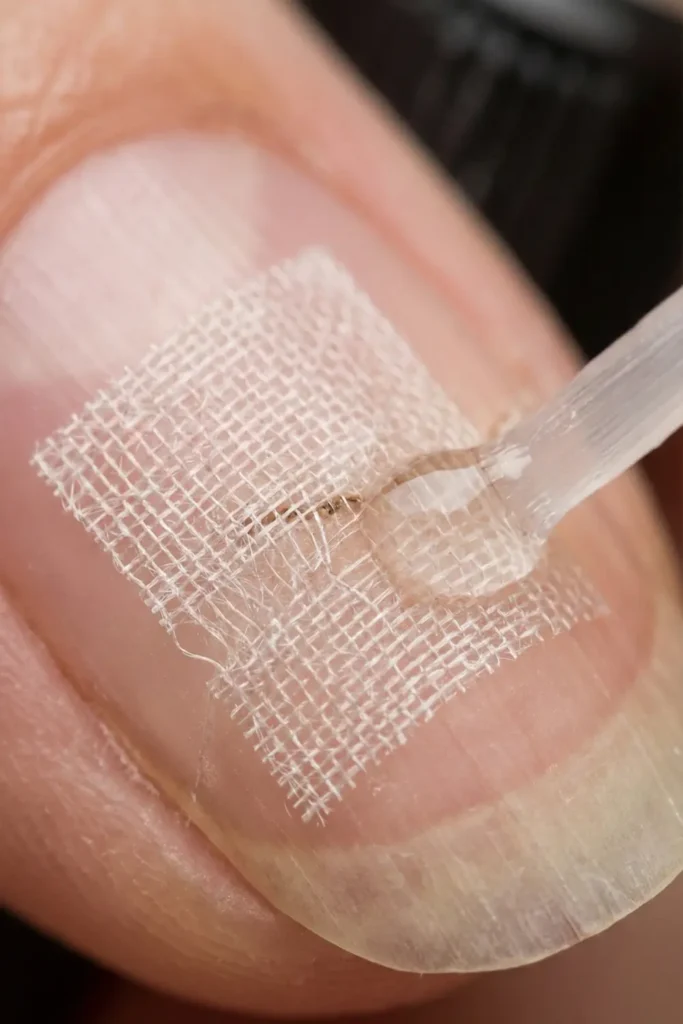
Method 2: The Silk Wrap (The Pro Solution)
If you have a particularly deep crack or you put a lot of stress on your nails, a tea bag might be too weak. This is where Silk Wraps or Fiberglass come in. You can buy these repair kits online or at beauty supply stores.
The Difference: Fiberglass is stronger than paper. It creates a mesh structure that is nearly indestructible once glued. This is what professional nail techs use when you come in with a “hospital nail.”
The Technique: It works exactly the same as the tea bag method, but the material is self-adhesive. You stick the silk onto the dry nail first, then flood it with glue or resin. Because the mesh is woven, the glue seeps into the holes, locking it to the nail plate with a stronger bond than paper can achieve.
Stylist Tip: If using fiberglass, wear a mask when buffing. The tiny glass particles can be irritating if inhaled.
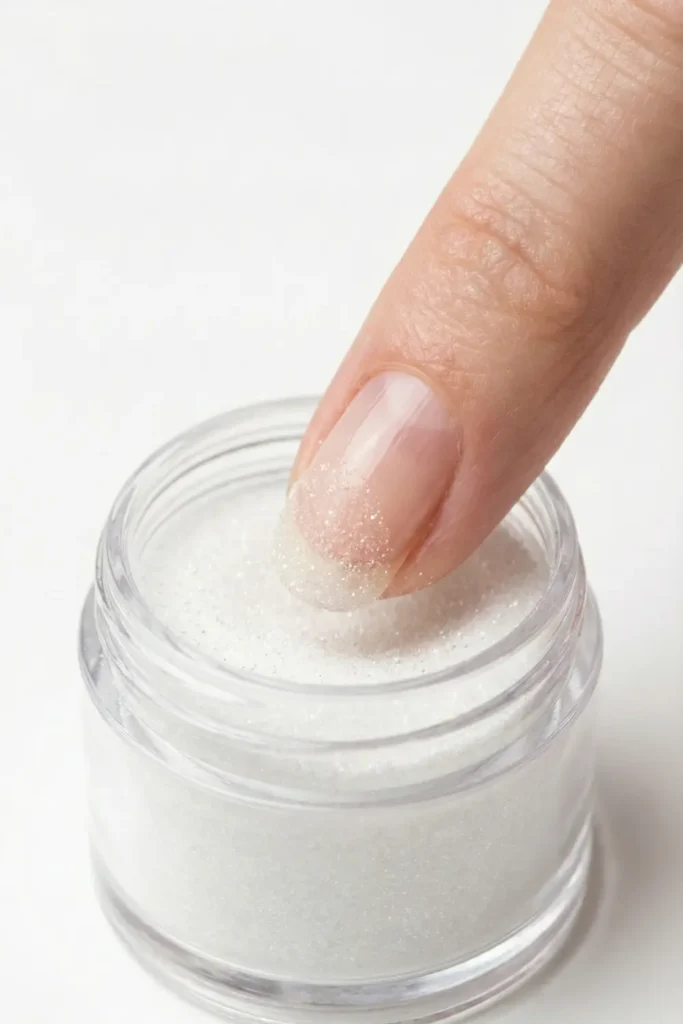
Method 3: The “Dip Powder” Band-Aid
If you have a Dip Powder kit at home, you have the ultimate repair tool. Dip powder (acrylic) is harder than glue alone.
The Fix:
- Apply your Dip Base liquid over the crack.
- Dip the entire finger into clear dip powder.
- Tap off excess.
- Repeat for a second layer just over the stress point.
- Activate and buff.
This creates a hard “cast” over the break. It basically turns your broken natural nail into an acrylic nail, giving it time to grow out until the break reaches the free edge and can be clipped off.
Prevention: Why Do They Keep Breaking?
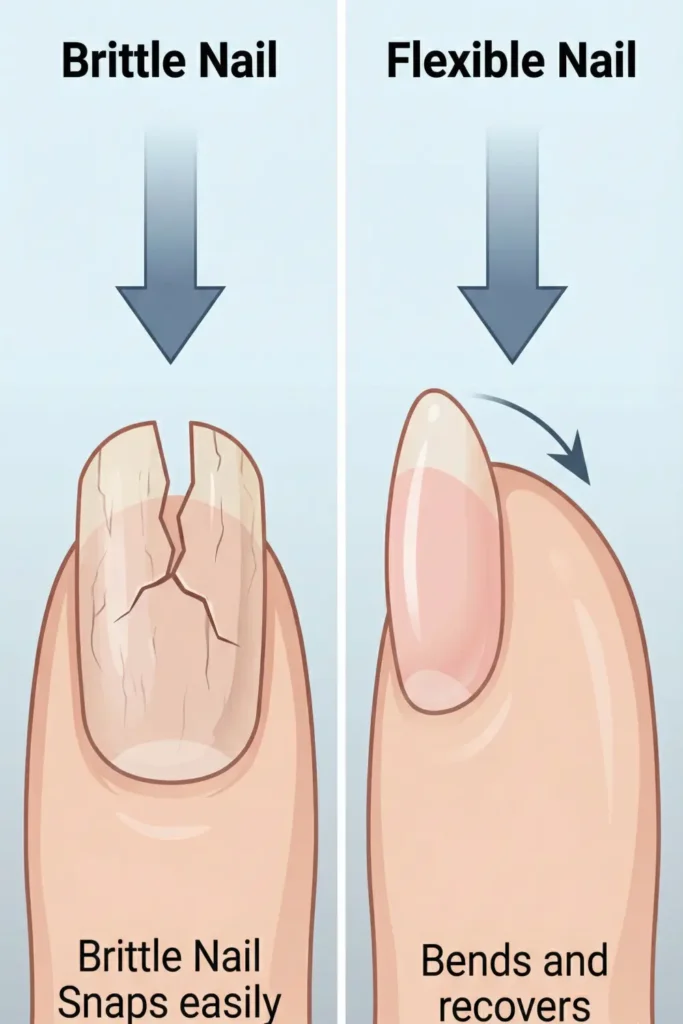
Fixing a break is good; preventing it is better. If you find your nails are snapping constantly, it is usually a sign of one of two things: Brittle Dehydration or Soft Weakness.
1. The “Snap” (Brittle) If your nail snaps cleanly like a dry twig, it lacks flexibility. It is too hard.
- The Cure: You need oil. Nails need to bend when they hit things, not snap. You need to be oiling your cuticles 3-5 times a day. Check out our guide to Cuticle Care 101 to see exactly which oils penetrate the nail plate best.
2. The “Tear” (Soft) If your nail bends, folds, and then tears like paper, it lacks keratin structure.
- The Cure: You need a protein strengthener (but use it sparingly) or a structured gel overlay like BIAB to act as a shield.
3. The Shape Factor Square nails break the most because the sharp corners snag on everything. Almond and Oval shapes are more aerodynamic—they deflect impact rather than absorbing it.
FAQ: Troubleshooting Your Repair
1. How long will the patch last? A well-done tea bag patch can last 1-2 weeks. However, nail glue degrades in water. If you swim or wash dishes often, the patch might lift. You can gently buff it down and re-apply glue on top to maintain it.
2. Can I use Super Glue (Krazy Glue)? Technically, yes—nail glue and Super Glue are both cyanoacrylate. However, Super Glue is often formulated for industrial materials, not the human body. It can be more irritating to the skin and harder to buff smooth. Always use glue labeled for nails if possible.
3. How do I remove the patch? Do not rip it off! That will rip the break open again. You remove it the same way you remove gel polish: soak it in 100% acetone. The acetone dissolves the glue.
4. Can I put gel polish over the patch? Absolutely. In fact, curing a layer of gel polish over your tea bag patch adds an extra layer of protection. Just make sure the patch is buffed perfectly smooth first, or the gel will look lumpy.
Conclusion
A broken nail is annoying, but it is not a death sentence for your manicure. With a humble tea bag and a little patience, you can bridge the gap and keep your length.
Think of it as a cast for a broken bone. You are stabilizing the injury to allow the body (or in this case, the nail matrix) to do its work and grow the damage out. By the time the break reaches the free edge in a few weeks, you can clip it off safely, and no one will have ever known the drama that occurred.
For more tips on identifying signs of nail trauma and when to see a doctor, check out Healthline’s Guide to Nail Abnormalities.