

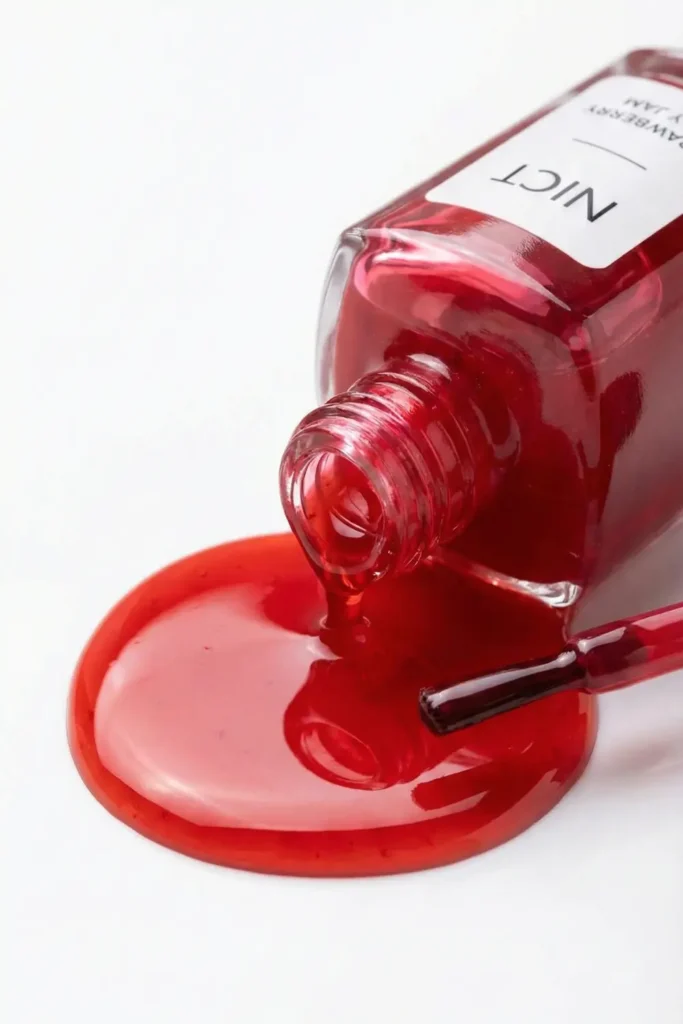
If you have been watching K-dramas, scrolling through “NailTok,” or keeping an eye on the streets of Seoul, you have likely noticed a massive shift. The era of flat, opaque, “paint-like” nail colors is taking a backseat. The aesthetic for 2026 is all about depth, dimension, and “juiciness.” Enter jelly nails, the translucent trend that makes your fingertips look like fruit gummy candies or colored glass.
Often called “Syrup Nails” in Korea and Japan, this technique relies on buildable, sheer color layers to create a soft, hyper-glossy effect. It is youthful, it is vibrant, and unlike the beige-heavy “Clean Girl” aesthetics of the past few years, it unapologetically embraces color.
But jelly nails are more than just sheer polish. They represent a specific texture—a squishy, wet-look finish that catches the light in a way opaque cream polishes simply cannot. Whether you want a subtle “blush” look for the office or a vibrant “amber glass” effect for a night out, this is the most versatile way to wear color this year.
In this comprehensive guide, we are breaking down everything you need to know: the difference between Jelly and Syrup, the best color trends for 2026, and a masterclass on how to mix your own custom jelly polish at home using products you already own.
What Are Jelly Nails? (The Science of Translucency)
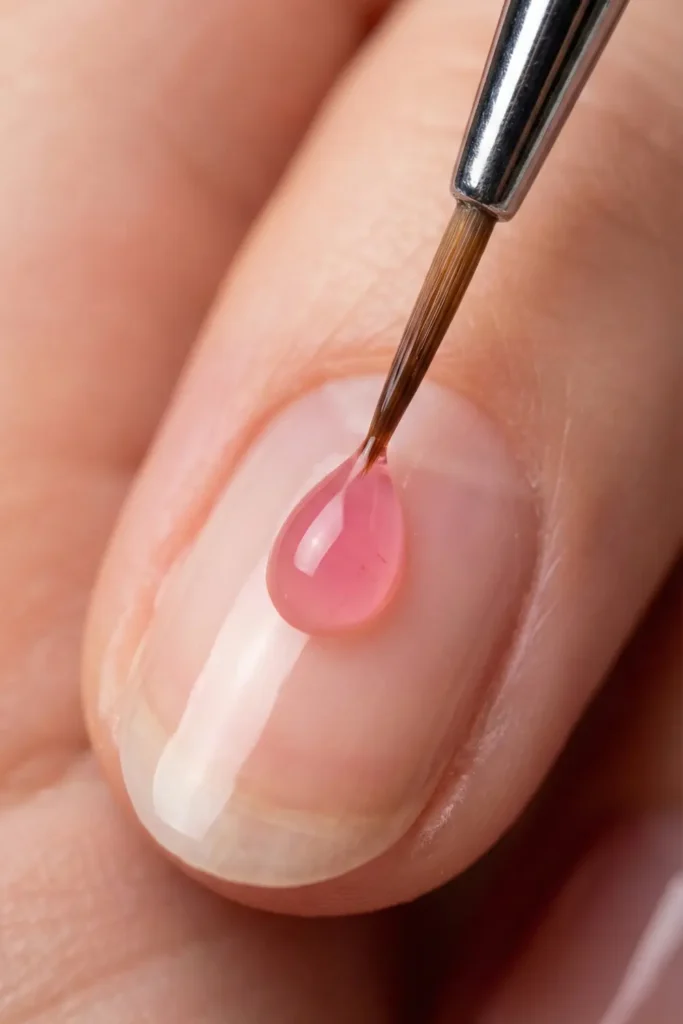
To understand why jelly nails are so popular, we have to look at the finish. Standard nail polish is formulated with a high load of pigment (titanium dioxide) to ensure it covers the nail plate in one or two coats. It is designed to be opaque.
Jelly nails, on the other hand, are formulated with a clear base and a very low pigment load. They are intentionally translucent. When you paint them on, they act like a colored filter or a pair of sunglasses for your nails. You can still see the natural nail line (the white free edge) underneath, but it is tinted with color.
This translucency creates depth. When light hits an opaque nail, it bounces off the surface. When light hits a jelly nail, it penetrates through the layers of polish and bounces back, giving the manicure a glowing, 3D appearance. It looks “wet” even when it is fully dry.
Why We Love It: Jelly nails are incredibly forgiving for DIYers. Because the polish is sheer, you don’t get the harsh, jagged “grow out” line at the cuticle that you get with dark, opaque colors. The transition is soft and seamless, meaning your manicure looks fresher for longer.
Jelly vs. Syrup: Decoding the Terminology
While the terms are often used interchangeably on social media, there is a technical difference in the salon world between “Jelly” and “Syrup.” Knowing the difference will help you ask for exactly what you want.
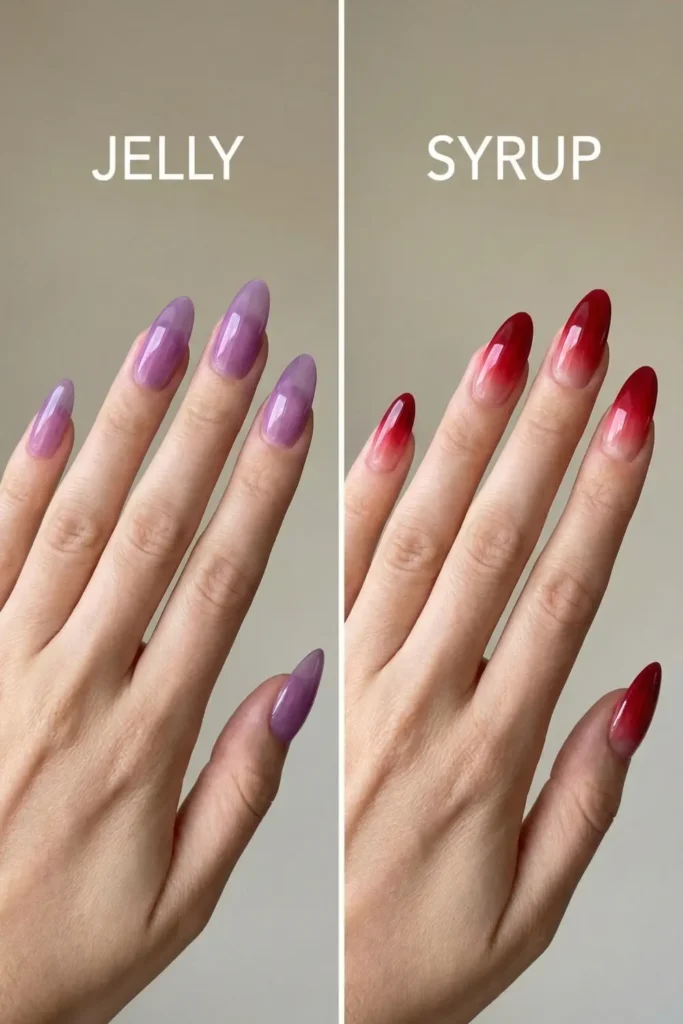
1. Jelly Nails (The Texture)
“Jelly” refers to the finish of the polish itself. It is a solid wash of sheer color.
- The Look: One uniform color from cuticle to tip.
- The Vibe: Like a Jolly Rancher or colored stained glass.
- Best For: Bold colors like neon lime, electric purple, or bright orange.
2. Syrup Nails (The Technique)
“Syrup” comes from the Korean term “Syrup Gradient.” It refers to the application method. It uses jelly polish to create an ombré effect.
- The Look: Very sheer (almost clear) at the cuticle, getting darker and “stickier” looking toward the tip.
- The Vibe: Like fruit syrup dripping down the nail. Soft, romantic, and gradient.
- Best For: Reds, pinks, and peaches to create the “blush” effect.
The Top 5 Jelly Color Trends for 2026
You can make any color a “jelly” color, but five specific shades are dominating the trend forecast this year. These are the looks you will see everywhere from Pinterest boards to the red carpet.
1. Amber & Tortoiseshell
This is the sophisticated, “old money” version of the trend. Using a burnt orange or brown jelly polish creates an “Amber Glass” effect. It looks vintage, expensive, and warm.
- Stylist Tip: Layer gold foil between coats of amber jelly for a fossilized gemstone look.
2. Strawberry Syrup (The “Wonyoung” Effect)
Named after the K-Pop idol aesthetic (Wonyoungism), this is a juicy, cool-toned pink. It gives the nails a healthy, flushed look, as if your blood circulation is just perfect. It is the ultimate “innocent” manicure and pairs perfectly with coquette bows.
3. Grape Soda (Y2K Purple)
A sheer purple that leans into the 90s/2000s nostalgia. It looks exactly like a grape lollipop or a game of Gameboy Color. It is playful, edgy, and pairs perfectly with silver jewelry.
4. Matcha Tea (Green Jelly)
Green can be a scary nail color when it is opaque (it can look like mold). But as a sheer jelly? It looks like refreshing iced matcha or jade. It is earthy, calming, and unexpectedly chic for Spring 2026.
5. Black Smoke (Goth-Lite)
For those who find pastels too sweet, “Black Jelly” is the answer. It is a sheer, smoky grey-black that looks like black sheer tights (pantyhose) for your nails. It is sexy, mysterious, and perfect for evening wear.

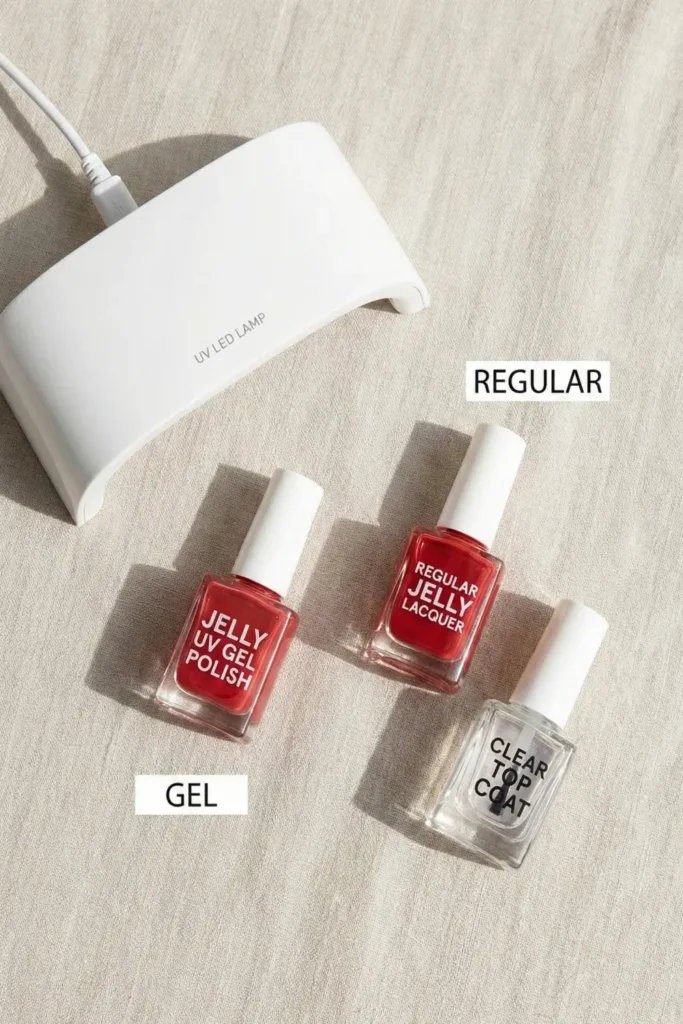
Gel vs. Regular Polish: Which is Best?
Can you achieve jelly nails with regular drug-store polish, or do you need UV Gel? Here is the honest breakdown.
The Case for UV Gel
- Pros: Gel is naturally thicker and glossy, which mimics the “glass” texture perfectly. It self-levels, meaning brush strokes disappear instantly.
- Cons: Requires a UV lamp and soak-off removal.
- Verdict: Best for the look. If you want that true, plump, K-Beauty syrup look, gel is superior.
The Case for Regular Polish
- Pros: Easy to remove, no lamp needed, cheaper.
- Cons: Dries by evaporation, so it loses volume (looks flatter). Can be streakier when diluted.
- Verdict: Good for beginners. You can absolutely do it, but you will need a very thick “gel-effect” top coat to replicate the plumpness.
Tutorial: How to Mix Custom Jelly Polish at Home
You don’t need to go out and buy a specific “jelly” branded polish. You likely have everything you need to create jelly nails in your vanity right now. The secret is the “Clear Polish Ratio.”
What You Need:
- Clear Medium:
- For Gel: Clear Builder Gel or Base Coat.
- For Regular Polish: Clear Top Coat.
- Pigment: Any opaque colored polish (Red, Pink, Orange, Blue).
- Palette: A piece of aluminum foil or a plastic lid.
- Tool: A nail art brush or a toothpick.
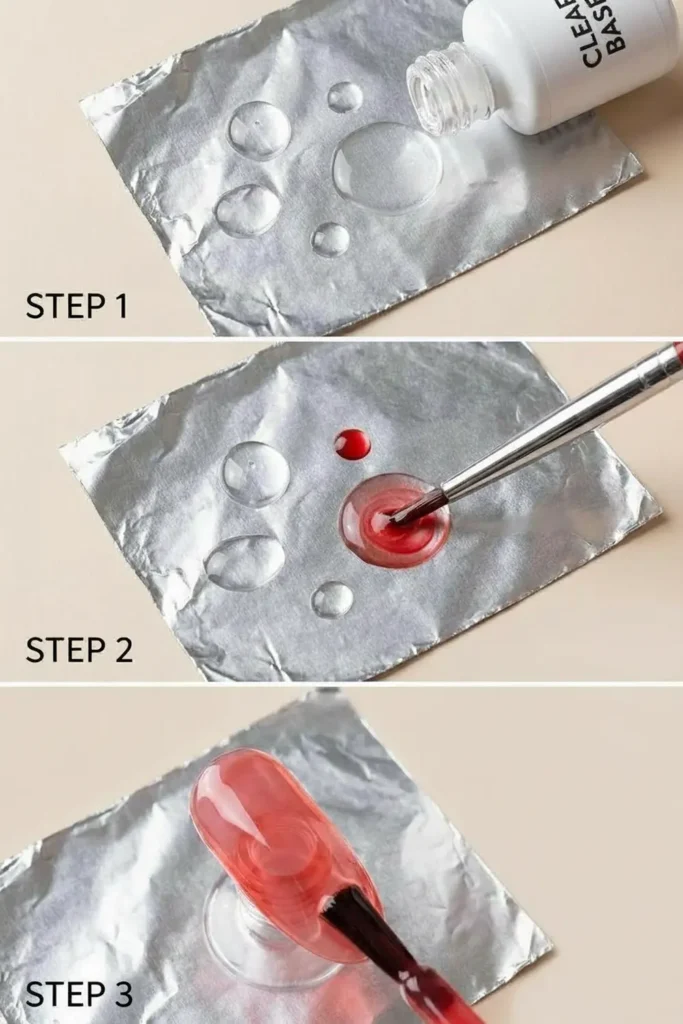
The “Golden Ratio” Recipe
The mistake most people make is using too much color. The pigment in nail polish is incredibly strong.
- The Drop: Place 3 large drops of your Clear Medium onto the foil.
- The Tint: Place 1 small drop of your Color Polish next to it.
- The Mix: Slowly drag a tiny amount of the color into the clear puddle. Do not mix it all at once! Mix gradually until you have a colored glass transparency.
- The Test: Swipe a bit on a piece of white paper. If it looks like watercolor paint, it is perfect. If it looks like paint, add more clear.
Stylist Tip: If you are mixing regular polish, work fast! It will start to dry and get stringy on the foil within minutes. If you are using Gel, you can take your time as it won’t cure until it hits the UV light.
How to Paint the “Syrup Gradient” (Ombré)
Once you have your custom mix, here is how to apply it to get that gradient fade that makes your nails look like dipped fruit.
Step 1: The Base Layer Apply your mixed jelly polish to the entire nail plate. Keep this layer thin. Cure (or let dry completely).
Step 2: The Mid-Point Dip your brush again. This time, apply the polish starting from the middle of the nail to the tip. Gently tap the brush at the starting line to blur it so there isn’t a harsh line. Cure/Dry.
Step 3: The Tip Saturation Apply a third coat, but only to the very tip (the free edge). This concentrates the pigment at the end, giving it that “juice settling at the bottom of the glass” look.
Step 4: The Plumping Finish with a generous layer of high-gloss top coat. This smooths out the “steps” created by the layers and unifies the gradient into one seamless blur.

The Best Nail Shapes for the “Glass” Effect
Believe it or not, the shape of your nail changes how the light refracts through the jelly polish.
1. Long Almond (The Best Choice)
Because almond nails have tapered sides and a rounded tip, they act like a lens. The light passes through the free edge beautifully, emphasizing the glass-like texture. This is the standard shape for the “Amber” and “Fruit” trends.
2. Short Squoval (The “Cute” Choice)
If you are doing the “Blush” pink or “Soap” trend, short nails are ideal. The jelly polish makes short nails look plump and hydrated, like little gems.
3. Coffin/Ballerina
This shape works well for the darker jelly colors (like Black or Purple), but be careful—if the tip is too wide, the transparency can sometimes look like the nail is just dirty. Ensure your gradient is smooth to avoid this.
Troubleshooting Your Jelly Manicure
Even with the best instructions, things can go wrong. Here is how to fix the most common jelly nail disasters.
Problem 1: It looks streaky.
- Cause: You didn’t mix the polish enough, or you applied too much pressure with the brush.
- Fix: “Float” the polish. Do not drag the bristles hard against the nail. Let the bead of polish glide over the surface. Also, apply a second coat—jelly polish is self-leveling and often fixes its own streaks with an extra layer.
Problem 2: It’s too opaque (not sheer enough).
- Cause: You underestimated the pigment.
- Fix: You cannot make it sheerer once it’s on the nail. You have to start over or accept a darker look. Next time, use a 4:1 ratio of Clear to Color.
Problem 3: Bubbles appear in the polish.
- Cause: Over-mixing on the foil introduces air.
- Fix: Mix slowly and gently. Do not “whip” the polish. If you see bubbles on the nail, pop them with a pin before curing or drying.
FAQ: Common Questions About Jelly Nails
1. Is “Glass Nails” the same thing as “Jelly Nails”? Close, but not exactly. “Glass Nails” usually refers to a trend involving cut-up pieces of iridescent cellophane foil to mimic shattered glass. Jelly nails refer strictly to the sheer tint of the polish itself. However, using jelly polish over chrome powder is often called “Aurora Glass” nails.
2. Can I use this technique to hide nail damage? Jelly polish is translucent, so it will show ridges, white spots, and discoloration. If your natural nails are stained or damaged, we recommend using a “milky” base coat first to blur imperfections before applying the colored jelly layers on top.
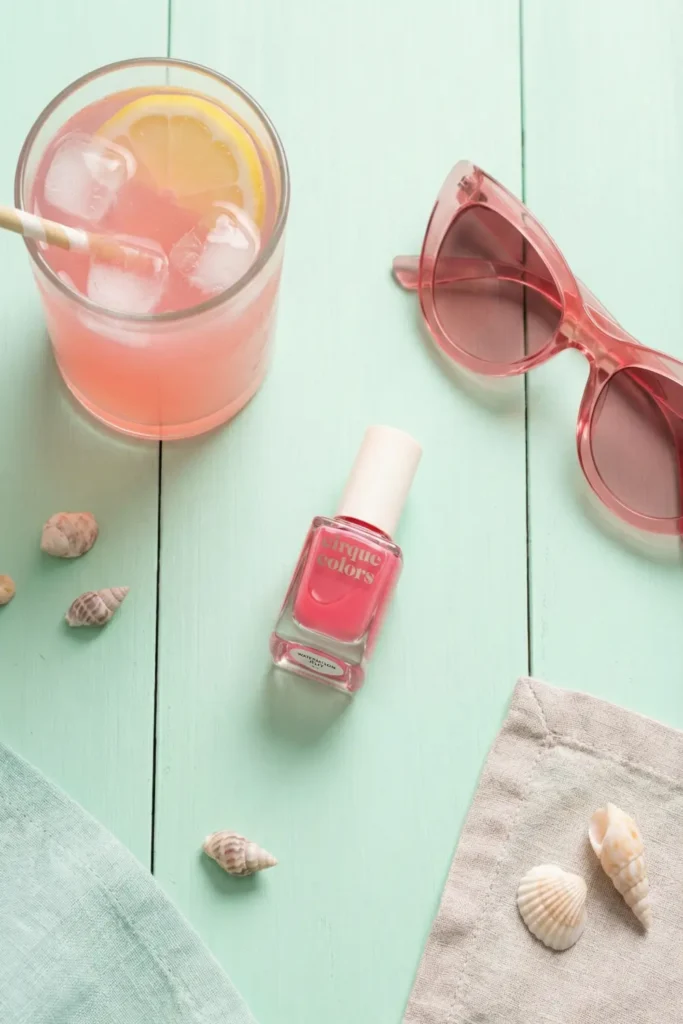
3. Which brand makes the best pre-made jellies? If you don’t want to mix your own, Cirque Colors is famous for their jelly collection (especially the tortoiseshell kit). Rom&nd (a Korean brand) creates the industry standard for “Mood Pebble” syrups that dry fast and look like gel.
Conclusion
Jelly nails are the breath of fresh air we need in 2026. They move away from the heavy, plastic-looking manicures of the past and embrace light, color, and fun. They are customizable, forgiving, and undeniably chic.
Whether you are mixing your own custom cocktail of polish at home on a piece of foil or asking your tech for a professional syrup gradient, this trend is the perfect way to play with color without it feeling “heavy” or overwhelming. It is juicy, it is glassy, and it isn’t going anywhere.
If you prefer a more opaque, modest look for the office, check out our guide on Micro French Nails 2.0: The Ultimate Short Nail Trend (2026).
For more on the K-Beauty influence on global trends and where this aesthetic started, read Vogue’s report on Korean Beauty Trends Taking Over.
Pingback: Minimalist Valentine’s Nails: 30 Non-Cheesy Ideas for 2026 - The Nail Aesthetic